Automated Backup via Robocopy in Powershell

Finally I got around to actually set up a Backup routine for my Hard drive to my little Raspberry Pi “NAS”.
I decided against any fancy Software and went straight to robocopy to mirror all my files. This has the added benefit of being able to browse the files normally, but it lacks any form of compression or security by itself. For me that is enough for now though, so I went with it.

The script is fairly simple. It basically first copies a few selected User related files from my C: drive to the appropiate folder on my HDD and then Mirrors the whole tree from D:\ downwards over to my Samba share on my RasPi.
I needed to include some exceptions though.

I replaced some personal Information in my script for security reasons, but here’s the whole script:
Write-Output "Starting Backup at $(get-date -f yyyy-MM-dd--hh:mm:ss)..." >> \\192.168.[...]\[Sharename]\Backups\Logs\$(get-date -f yyyyMMdd)WindowsBackupScript.log
Write-Output "Exporting Programlist" >> \\192.168.[...]\[Sharename]\Backups\Logs\$(get-date -f yyyyMMdd)WindowsBackupScript.log
$tempCSV = Get-ItemProperty HKLM:\Software\Microsoft\Windows\CurrentVersion\Uninstall\* | Select-Object DisplayName, DisplayVersion, Publisher, UninstallString | where DisplayName -NotLike *Microsoft*
$tempCSV += Get-ItemProperty HKLM:\Software\WOW6432Node\Microsoft\Windows\CurrentVersion\Uninstall\* | Select-Object DisplayName, DisplayVersion, Publisher, UninstallString | where DisplayName -NotLike *Microsoft*
$tempCSV | Export-Csv D:\UserBackups\ProgramExport.csv
Write-Output "Copying User Stuff to Mainspace..." >> \\192.168.[...]\[Sharename]\Backups\Logs\$(get-date -f yyyyMMdd)WindowsBackupScript.log
robocopy 'C:\Users\[Username]\AppData\Roaming\Microsoft\Windows\Start Menu\Programs\customLinks' D:\UserBackups /MIR /Tee /Z
Write-Output "Backing up Mainspace..." >> \\192.168.[...]\[Sharename]\Backups\Logs\$(get-date -f yyyyMMdd)WindowsBackupScript.log
cd D:\
robocopy D: \\192.168.[...]\[Sharename]\Backups\[PC-Name]\Mainspace /MIR /LOG+:"\\192.168.[...]\[Sharename]\Backups\Logs\$(get-date -f yyyyMMdd)robocopyD_log.log" /Z /XD D:\Steam "D:\other games" D:\HyperV D:\`$RECYCLE.BIN D:\Recovery "D:\System Volume Information" D:\config.msi -np -ndl -tee
Write-Output "Finished Backup Job at $(get-date -f yyyy-MM-dd--hh:mm:ss)" >> \\192.168.[...]\[Sharename]\Backups\Logs\$(get-date -f yyyyMMdd)WindowsBackupScript.log
Read-Host -Prompt "Finished all Backups. Press Enter to open the Logfile(s)."
& 'C:\Program Files\Notepad++\notepad++.exe' "\\192.168.[...]\[Sharename]\Backups\Logs\$(get-date -f yyyyMMdd)robocopyD_log.log"

So, what does my script do?
I wanted to have a log of when the script does what, so I included “comment” lines which output what the script does to the log file.

In a case of me having to reinstall Windows from scratch I decided to have some sort of list of installed programs. Backing up the installers or executables felt like a weak way to do this though, so I let powershell grab the installed programs from the registry directly and let it compile into a csv file.
$tempCSV = Get-ItemProperty HKLM:\Software\Microsoft\Windows\CurrentVersion\Uninstall\* | Select-Object DisplayName, DisplayVersion, Publisher, UninstallString | where DisplayName -NotLike *Microsoft*
I decided that I’d filter out everything with “Microsoft” in the name so I wouldn’t have all the restributables and stuff cluttering the list. This way a few actual programs get filtered out, but most of them are obvious enough for me to not be important in that list.
Anyway, this should help me remember the various programs I installed, just in case.

robocopy 'C:\Users\[Username]\AppData\Roaming\Microsoft\Windows\Start Menu\Programs\customLinks' D:\UserBackups /MIR /Tee /Z
This little line copies the custom links I created so I can just type in the script names to run them.

Kinect V2 conversion

I have bought a used Kinect V2 (the Xbox One version) and converted it for PC usage. This eliminates the need of an overly expensive kinect-to-USB adapter cable. The kinect itself uses a modified version of a USB B 3.0 plug. The only modification is that it also carries the 12V required to run the sensors.
And you can actually feed the 12V through the extra pin directly and use a normal USB B 3.0 cable for your PC to connect. I won’t go over the process in Detail, but it is quite easy to do anyway:
Step 1 Open the Kinect up (you need to peel off some glued on stickers that cover the screws on the bottom)

Step 2 Solder a power cable to the respective Pin and Ground.
Step 3 Close it back up.
After this you just need a 12V 3A power supply and connect that to the soldered on connection. The rest is a thing of installing the kinect sdk on the PC for it to recognize the kinect correctly.
For this I followed several tutorials to make sure I make the correct steps.

Making a “Useless Box / Useless Machine” as a birthday present

When trying to think of a nice birthday present for a friend I came up with one of these “useless machines” we both love the thought of.
So my final plan was: have a more complex, arduino controlled useless machine that is still programmable and runs of an easily removable USB power bank. This way the this becomes a 2-in-1 gift: the power bank and the actual mechanism.

My initial plan was to build two of these things – one as a prototype and a second cleaner, better version as the actual gift. So I ordered the parts I’d need twice and started designing in Fusion 360.
At first I wanted to make on 100% myself and just used those of other people as a reference. Well, that didn’t really work out, since after printing it out I realized it A: didn’t work and B: was way too big.


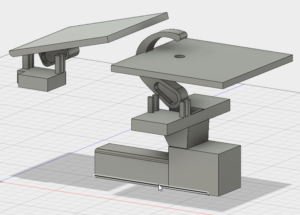
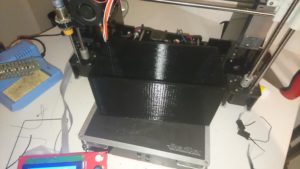
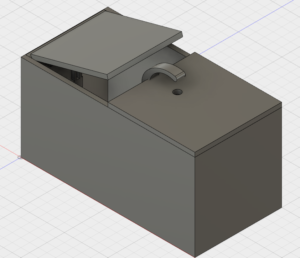
This is what my first version looked like. After starting to print it out I ditched that and revised my plan. Here is the body printed out:

So from then on I decided that I’d take an existing model and modifiy it to my needs. I ended up using this model from thingiverse:
https://www.thingiverse.com/thing:1258082

I remodeled the bottom plate of the box to suit my need and create a “hotplug” functionality with the power bank.

After assembling my first prototype of the top half and coding a basic switch function this happenend:

Sooooo I had to slightly adjust the code for it to work.

After putting together the a behaviour of the box I was happy with I printed a second batch of Parts and assembled it. The second version got a lot cleaner than the first one. I also glued in a little stretchable string to hold down the lid.

In the code I not only had a few “animations” it could randomly choose, but also a few idle “animations” when the switch doesn’t get pressed for some time.


Automating my dehumidifier

For a while I have kinda struggled with humidity in my apartment. Opening windows doesn’t do much and gets uncomfortable after a while when it’s really hot or cold outside.
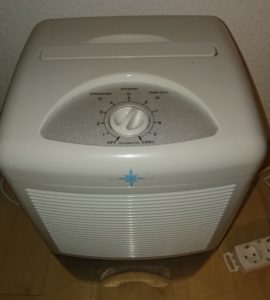
So I purchased a dehumidifier some time ago. It worked great so far, but it just didn’t behave like I wanted it to.

So I thought I’d make a small project out of it to see where I can push it. After opening it up, I quickly realized that the control circuitry is buried deep inside the device, and since it quite expensive I decided against opening it up further. So instead of directly interfacing with it, I had to get creative.
The dial on the top was also plastered with rivets, and I didn’t want to do anything irreversible.
So I went for my only idea I had left – even though it felt a little bit awkward: letting a servo turn the dial and leave the rest of the device alone.
For that I quickly whipped up a 3D model of a little clip for the servo to grab onto the dial, and of course a holder to have the servo stay in the required position. After a bit of measuring I based the holder design on the clip I used to upgrade cardbot. The first version fell a bit short, so I had to adjust the length of the pillars and print it again.
I used 3M glue pads to hold the holder in place.

I needed to tweak the code several times, as well as fix a huge oversight I had at the start, which just made the arduino switch the positions after each time out.

I’m really happy with how this turned out though. Maybe I’ll replace the two potentiometers with static resistors in the future, so I can use them for other projects.

Arduino Lotto number generator

While teaching a friend of mine about the arduino set I recommended to him, he had an idea for a little project he wants to try next. I thought the thought was interesting, so I gave it a try myself so I can help him more easily.

The task: Have the arduino generate random numbers to use for the “LOTTO 6 aus 49” lottery. The numbers to generate are simple: you need 6 numbers from 1 to 49 and one “Superzahl” from 1 to 9 at the end. The Numbers should be displayed on the LCD display so you can easily run it on battery and make it portable.

My solution: To my current knowledge none of the available random functions are truly random. Especially on the Arduino they’re Pseudo-Random and not quite the solution we’re looking for. Even though it would be random enough in theory, I wanted to try and find a more unpredictable way. My idea to do that was to introduce the human factor. Making it similar to a slot machine, I used a button that the user would have to press for each number while the Arduino loops through all the possibilities one by one on each tick. Once the button is pressed it locks the number in and starts the loop for the next one.

I think this way is the closest to “truly random” as you can get easily with just these components.

I will include a download link to the source code below, but it still has one obvious flaw: it doesn’t check for duplicates – which is not possible to use for the actual lottery. I decided that I were done with this contraption, since my friend had the duplication check figured out fairly quick on his own.

Click here to download the arduino source code: Arduino Lotto Generator project files

Fetch Machine

While being active in the community of Letsrobot I got an offer to try a product of Bare Conductive in trade with a documented project I do for their own blog. I got really interested in the product, so I agreed. It did take me a few months to actually finish it, but I have finally completed the project and got featured on both bare conductive’s site as well as adafruit’s one.

The product in question is the “Pi Cap” which is a hat for the Raspberry pi and adds a bunch of Capacitive touch and distance sensors. I wanted to make a product with my robots I built with LetsRobot in mind. Often enough I had people ask me to toss a ball across the room so they could fetch it, kinda like a pet. That’s what gave me the idea of a automatic fetch machine – like the ones that shoot tennis balls for dogs so they can play with themselves.

I ran into quite a few problems along the way. To list the biggest ones:

  1. Detection of the ball/robot: I thought I could make the capacitive sensors pick up the robot and motors, but that didn’t work at all. Also I needed the ball to be picked up somehow and didn’t needed a way to make that work as well.
  2. Creating the 3D models: While I already got some experience with smaller and less complicated models and thought I could create such models with some work. It took way longer than I thought, but eventually I managed to finish them.

Below a small gallery of the different steps I completed.

A summary of how it works: The script in the background is written in python and runs on the raspberry in the background. The Pi Cap senses the ball with a cable to a little aluminum foil piece which touches the ball when inserted into the loading arm. The arm is designed in such a way that the ball always rolls in the right spot to make contact. Once it senses something the script pauses for a few seconds to give the robot time to get out of the way. After that it sends a new positon for the loading servo to the servo microcontroller. This causes the ball to roll into the shooting head. After spinning up the two DC motors placed to accelerate the ball, the script moves the second servo to push the ball into the two motors. I also integrated a small LED to indicate the script sensing the ball and doing stuff.

Here is my last test:

And here a video of it in action:

Repairing a ripped model of the barrel train, making it suitable for printing and painting it with acrylic paint!

So I really wanted to print out something from Mario Kart Double Dash for future meet-ups with the friends I made in that community. The first thing that came to mind was the vehicle everyone uses since it’s the fasted in the game: The Barrel train.

After finding NO models on all the various 3D modell collection sites, my friend Goomba got in contact with a people working on a sort of mod for the game. And one of those guys was kind enough to rip the model files from the game and send them my way. After converting them into usable files I needed to repair the obvious flaws, like unprintable details, missing wheels and missing connections.

Even though it was my first timing doing something like this it was fairly easy with Fusion 360. My first attempt was very easy to break on the small connections.

(Notice the already broken part on the front, as well as the problems with bridging of the handlebar)

Here with the thicker connections:


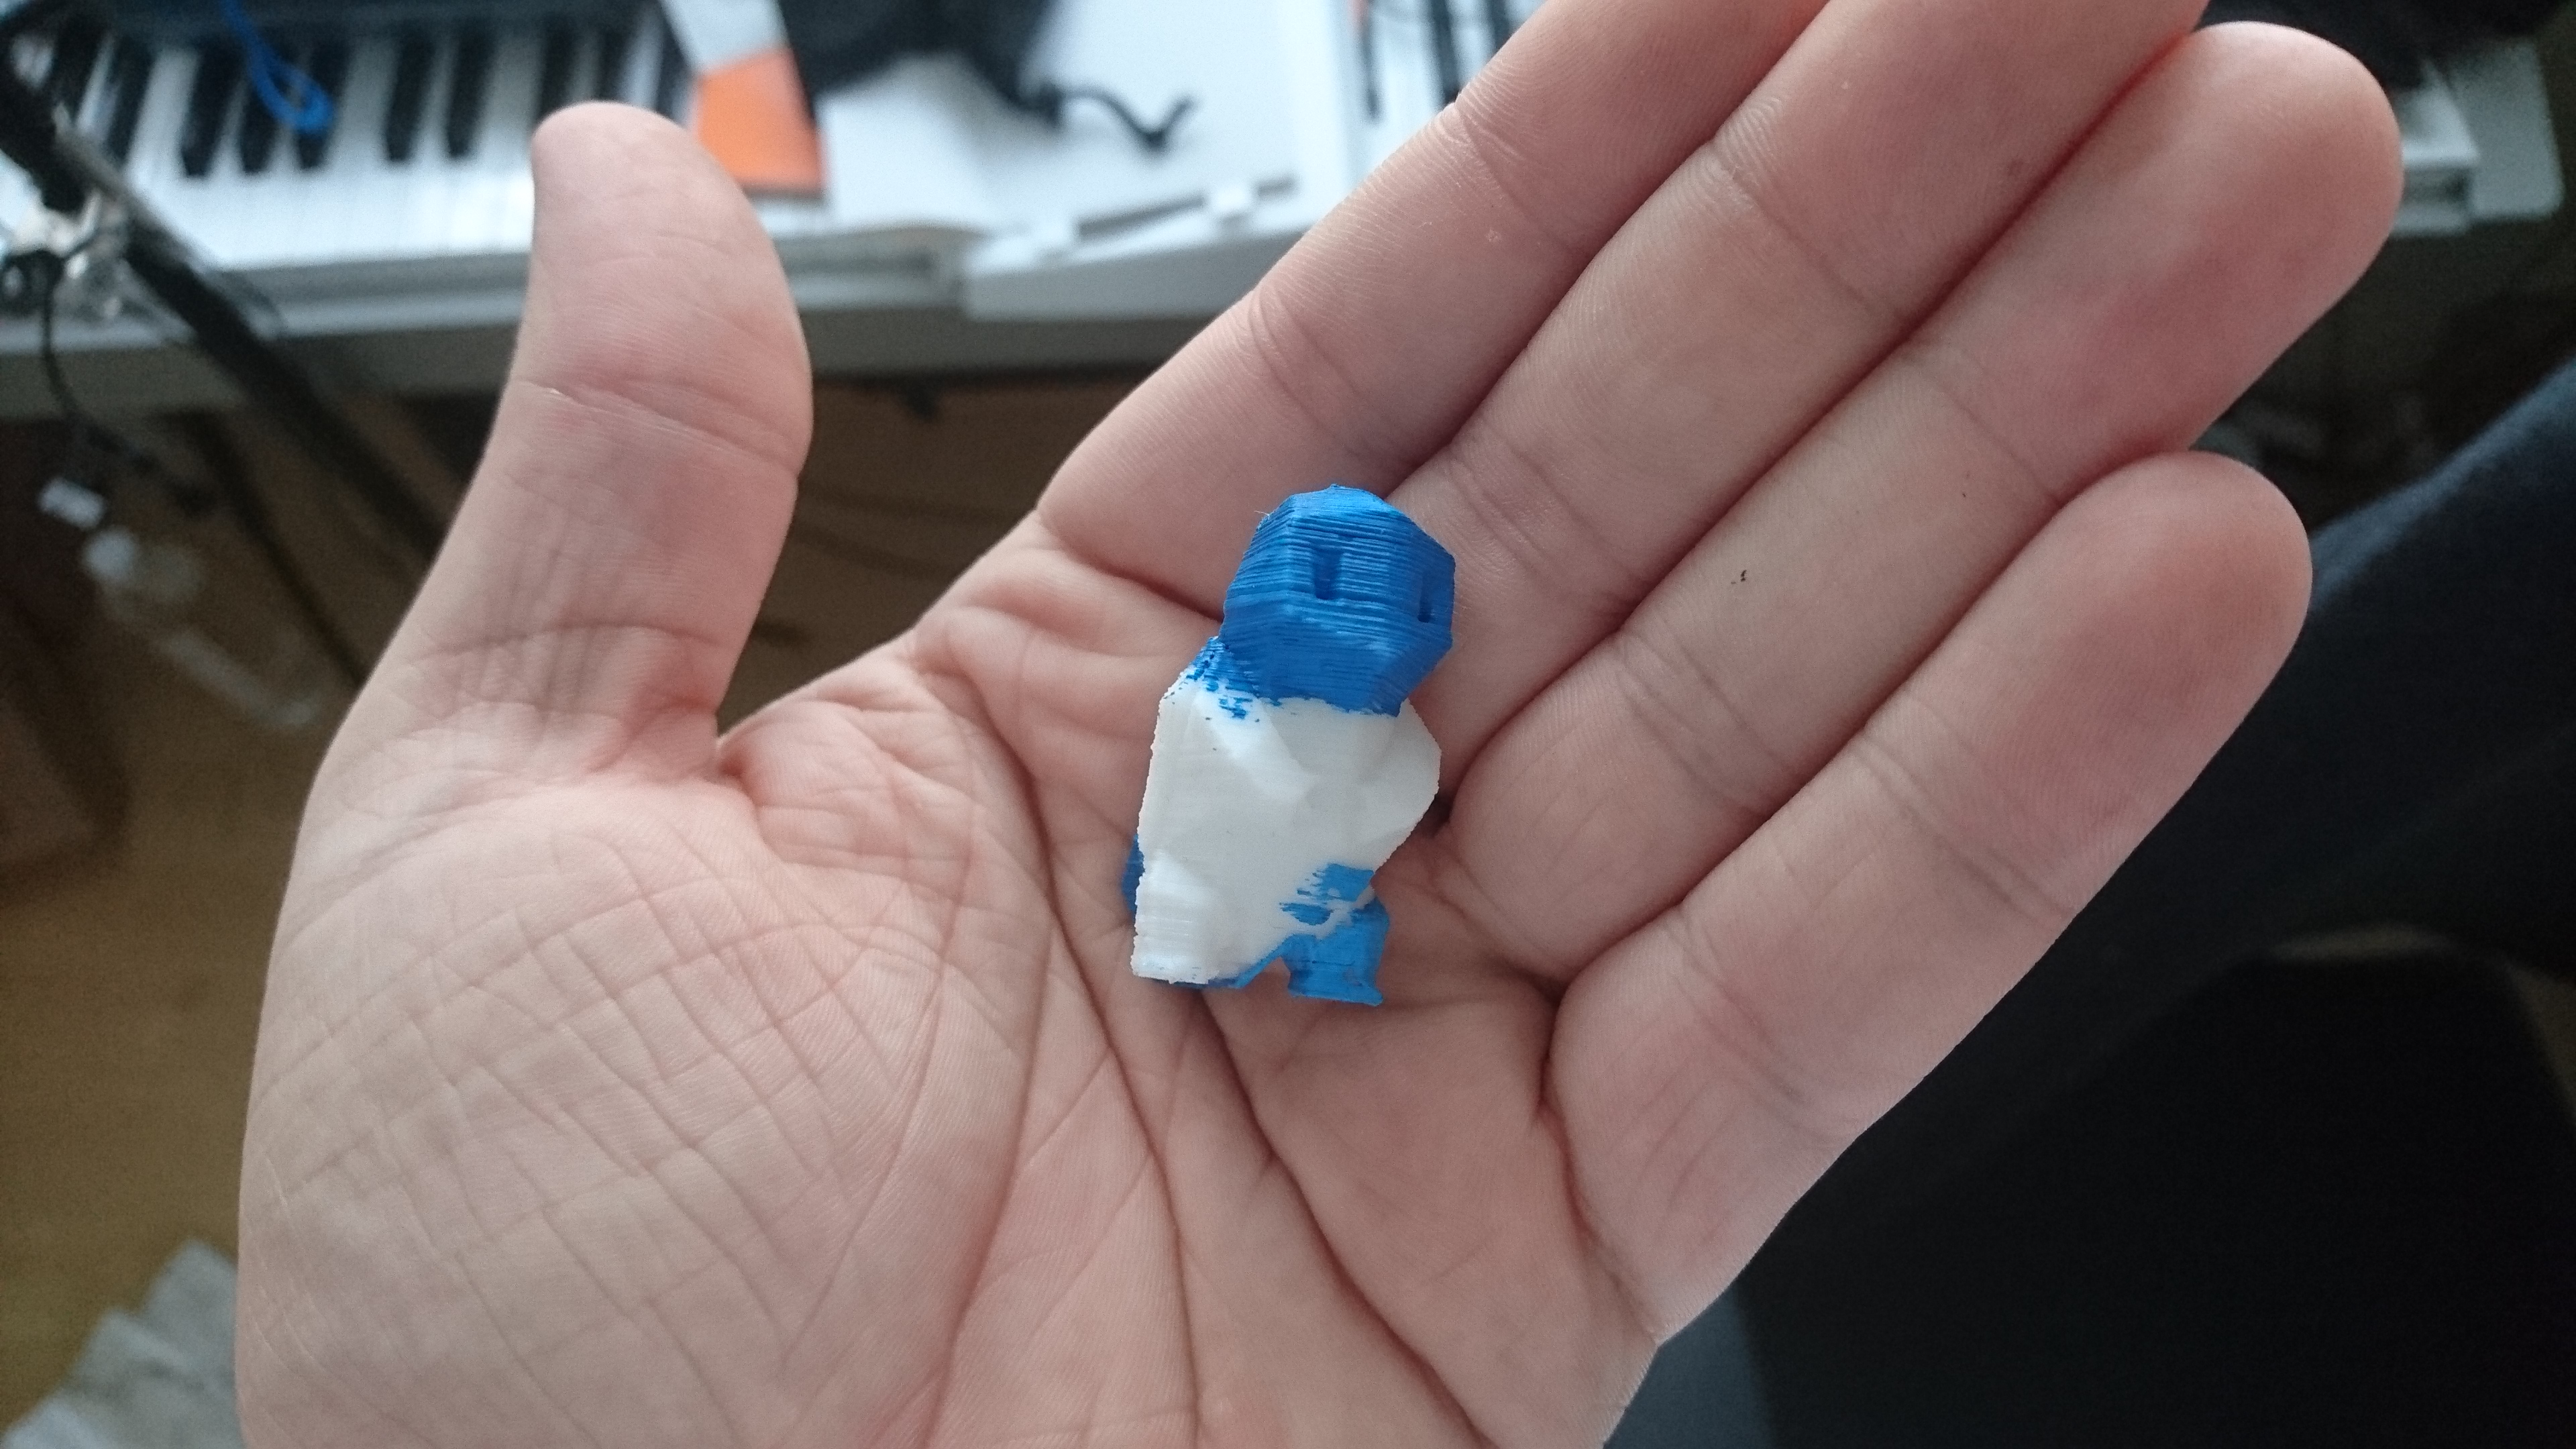
Now I were quite happy being able to print little barrel trains, but I wanted to see if I could paint it to resemble the real one more. So I lent some acrylic paint from my mother together with an assortment of brushes and gave it a shot. First I tried it on a low-poly squirtle model I printed in white PLA somewhen earlier.

Happy with the result with how well the color sticks to the plastic I thought I will see how bad the layers lines look on a completely painted model. I already knew about priming, sanding and other methods of finishing + painting prints, but I mainly wanted to see how it would look without all that effort. The painted Barrel Train was also printed in white PLA.


Pokéball print

I found a really nice model on Thingiverse that I wanted to give a go: A “functional” Pokeball – that actually opens! I loved the idea, so I tried it.

My main problem was getting the hinge insert and white button in the front precise enough. Like I already mentionend, without tinkering and completely upgrading several parts, it just doesn’t print precise enough for models like this.

After a lot of tweaking and trial & error, I finally managed to make it kinda work. I ended up printing the button a bit larger and trimming it down until it fitted, but I reached the infill since I didn’t make the walls thick enough for this.

Lessons learned…


Two print “orders” from a friend for his robots

After using my printer to improve my own robots, I quickly peaked the interest of a friend of mine that I know from the LetsRobot Community. He wanted to replace 4 wheels of one of his robots, as well as have a customized mount for his RasPi camera module + LED matrix. As Wheels he wanted to use the open source wheels provided by the LetsRobot team, so that was easy enough. Just download the .stl, tweak a few settings and let it print. Each wheel took a bit over 3 hours and quite a lot of material.

The camera bracket was quick to print, but we needed to design that first so it could fit his needs. Fortunately this wasn’t all too complicated and after finding specsheets for the two modules I could quickly model the bracket for his need.

My first print didn’t turn out too well, and I realized I needed to print it in another orientation. The camera module didn’t fit anyway since I didn’t give the model a big enough tolerance to compensate the quality of my printer. But already the second attempt worked out way better, so I printed the bracket three times (2x for his robots and 1x in case anything breaks) and included it in the shipment.

Cardbot V2 stabilization with 3D Printing!

Once I got my 3D Printer working and had it dialed in, I wanted to do this overdue upgrade. Over time the tape got loose over and over and the motors started sagging so hard, that the cardboard dragged on the ground. This was one of my first designs I created and printed.

These two prints made the bot usable again since it fixed the dragging body as well as stopped the Camera head from constantly falling down.